Mastering Supabase & WordPress Integration with WP Supa Integration
In today’s fast-paced web development landscape, combining the power of a robust content management system like WordPress with a modern, scalable backend like Supabase is a game-changer. It allows you to build dynamic applications, manage users, and handle data in real-time — all without extensive custom coding.
The WP Supa Integration plugin acts as the bridge, seamlessly connecting your WordPress site to your Supabase project. This guide will walk you through the advanced configuration steps, showcasing how to leverage the full potential of this powerful combination.
🚀 Get the WP Supa Integration Plugin!
New to Supabase? Sign up for free here!
Step-by-Step Integration with WP Supa Integration
1. Configure Supabase Credentials
The first and most critical step is to establish a secure, code-free connection between your WordPress site and your Supabase project. This involves inputting your unique Supabase Project URL and Anon Public Key into the WP Supa Integration plugin settings. These credentials are your site’s secure handshake with Supabase, enabling all subsequent features.
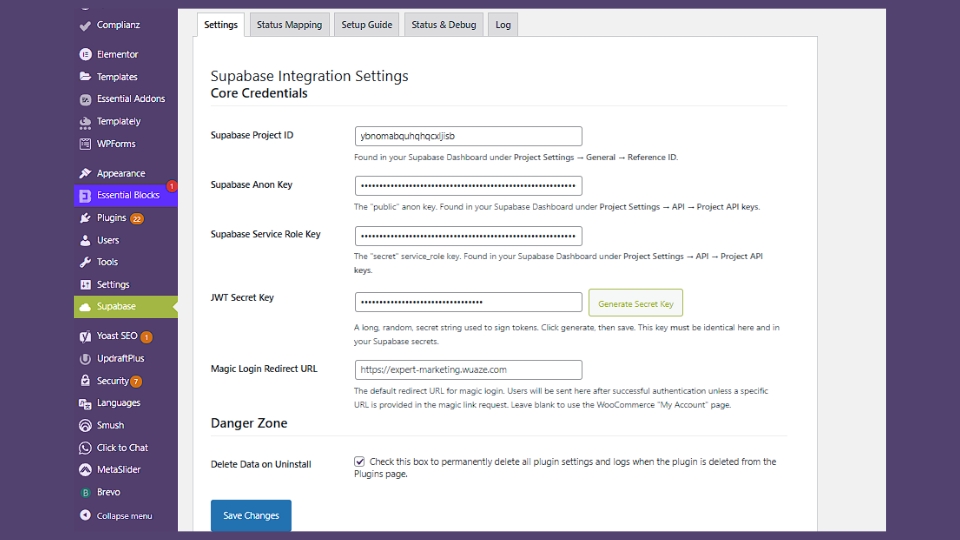
Project Settings > API.
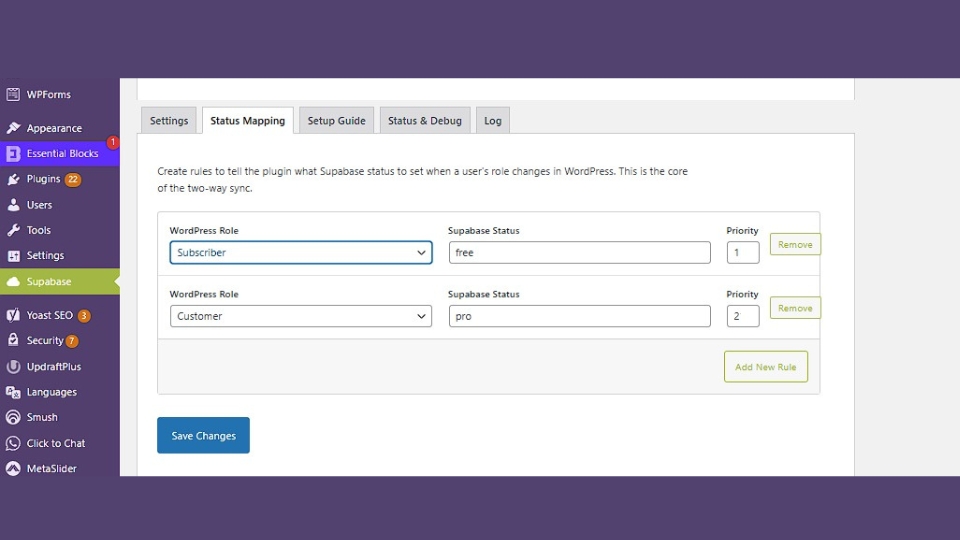
2. Set Up Role Mapping Rules
Achieve a single source of truth for user roles across both platforms. With WP Supa Integration, you can create intelligent rules to map Supabase user roles directly to WordPress user roles. This ensures consistent access control and permissions, whether a user logs in via WordPress or a Supabase-backed application.
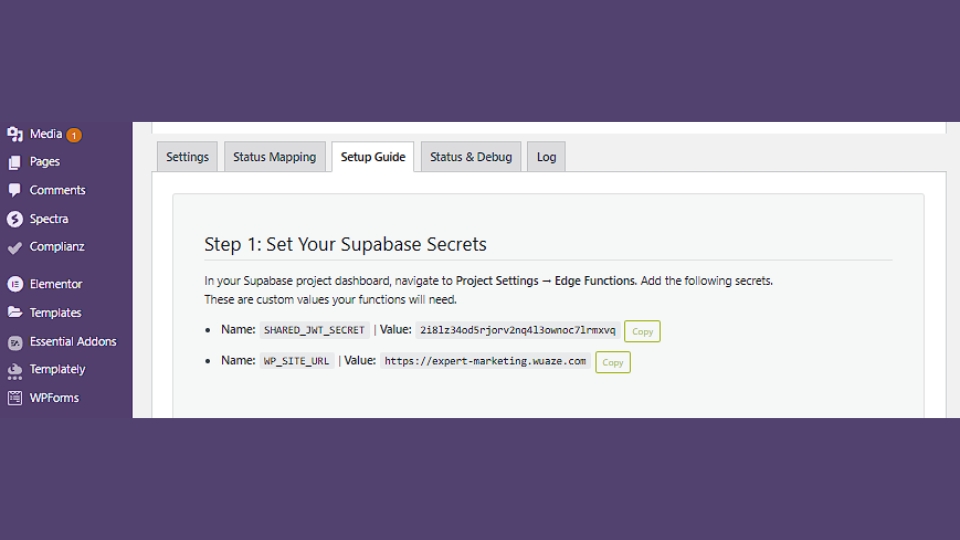
3. Configure Your Supabase JWT Secret
Security is paramount. The plugin allows you to set your Supabase JWT (JSON Web Token) secret, which is crucial for verifying the authenticity of authentication tokens. This secret is used to sign and verify the JWTs issued by Supabase, protecting your webhooks and Edge Functions from unauthorized access.
4. Implement Profiles Table & Trigger
Streamline user data management by automating profile creation. Configure a “profiles” table in Supabase and set up a database trigger that automatically creates a corresponding profile entry whenever a new user signs up. This ensures a consistent data structure for all your users, ready for extended data.
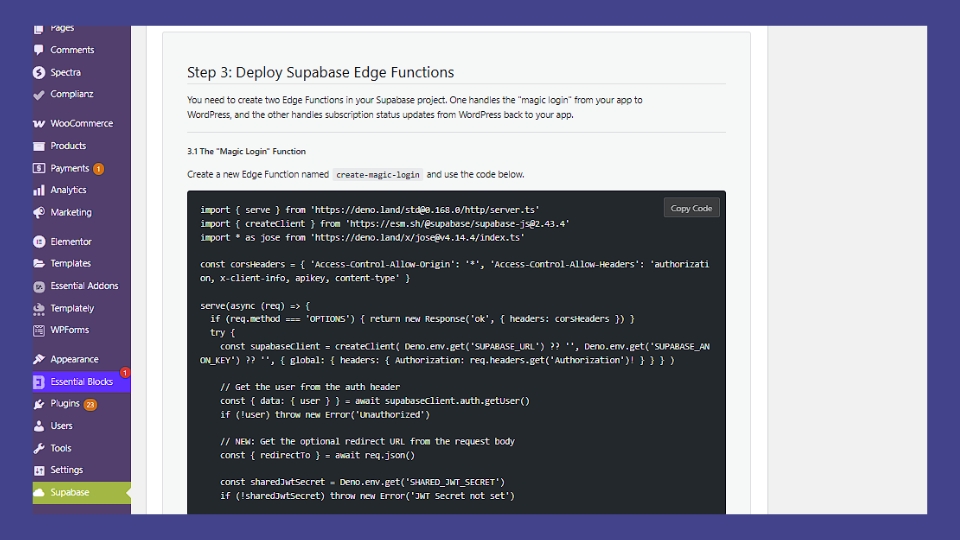
5. Integrate Magic Login Edge Function
Offer a modern, passwordless authentication experience. The WP Supa Integration plugin supports Magic Login links via Supabase Edge Functions. This allows users to receive a secure, one-time email link to log in, bypassing passwords and simplifying the login process while ensuring secure redirects.
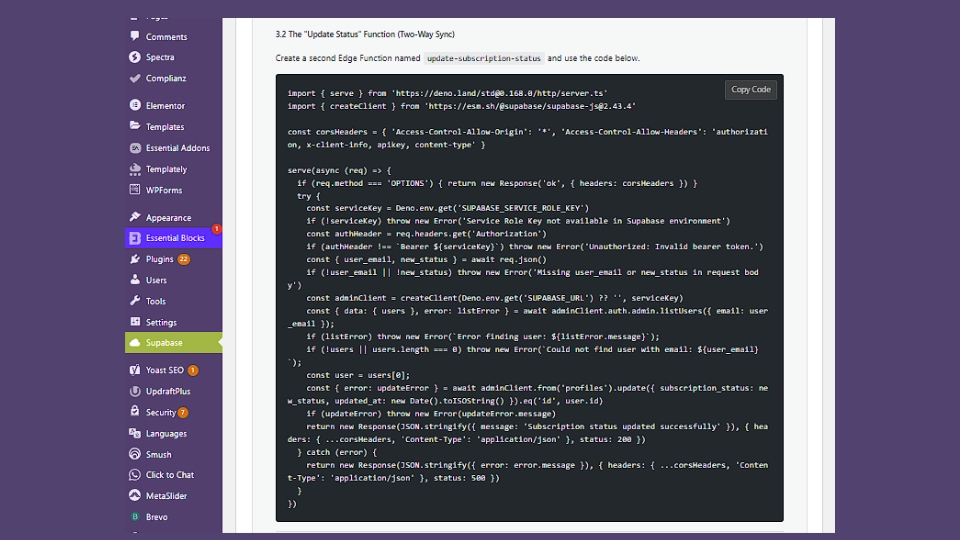
6. Automate Subscription Status Updates
Keep your user roles and subscription statuses in perfect real-time synchronization. This feature is invaluable for membership sites or SaaS platforms where user access depends on their active subscriptions. Any change in Supabase is instantly reflected in WordPress, maintaining data integrity effortlessly.
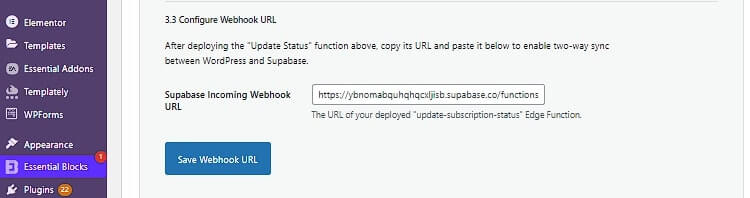
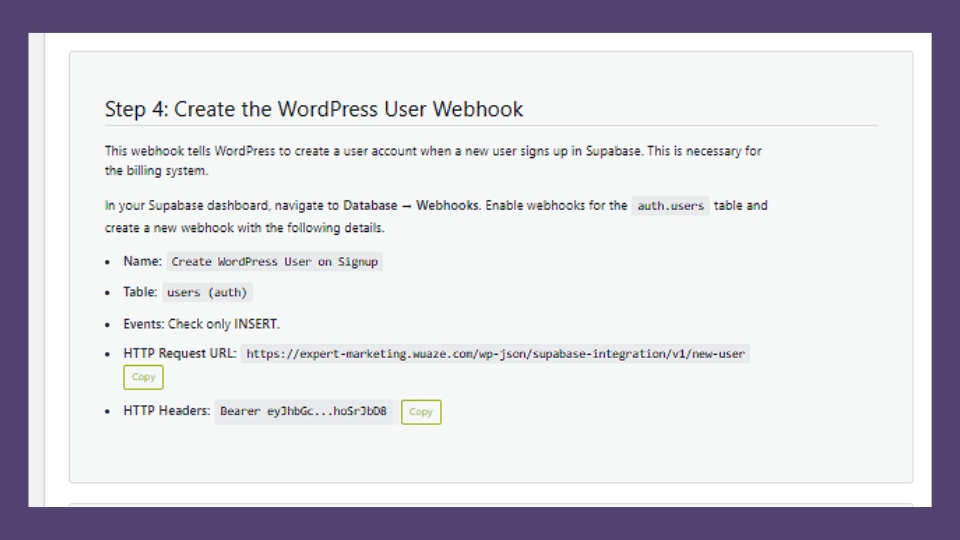
7. Set Up Webhook for Two-Way Sync
Enable truly dynamic workflows with two-way synchronization via webhooks. When a user signs up in Supabase (e.g., from a separate mobile app or a custom front-end), a webhook can automatically trigger the creation of a corresponding user in WordPress. This is perfect for initiating WordPress-specific workflows for new users.
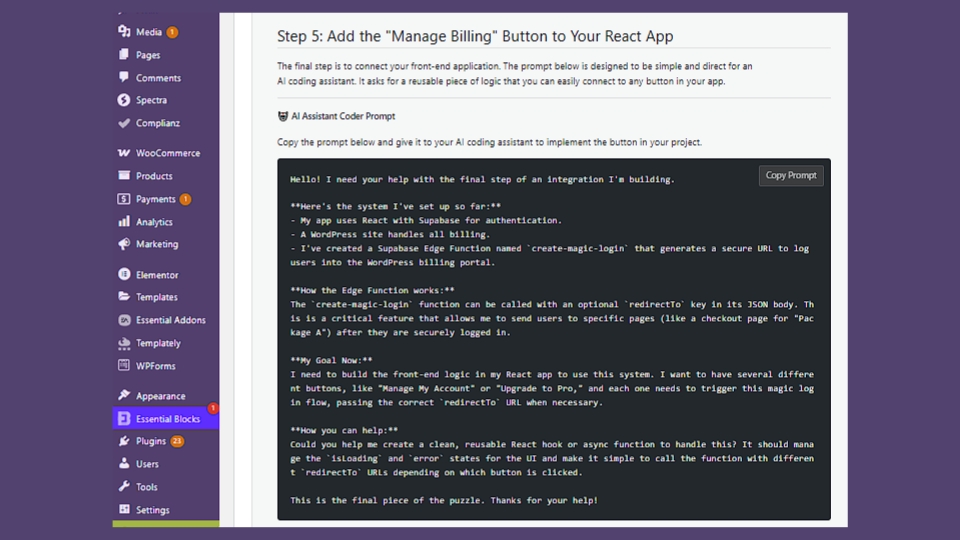
8. Add “Manage Billing” Button
Enhance user experience by providing a seamless way for users to manage their billing directly. The plugin allows you to add a “Manage Billing” button that can trigger secure magic login links. This is particularly useful when integrating with Stripe or other payment gateways, allowing users to instantly access their billing portal without a separate login.
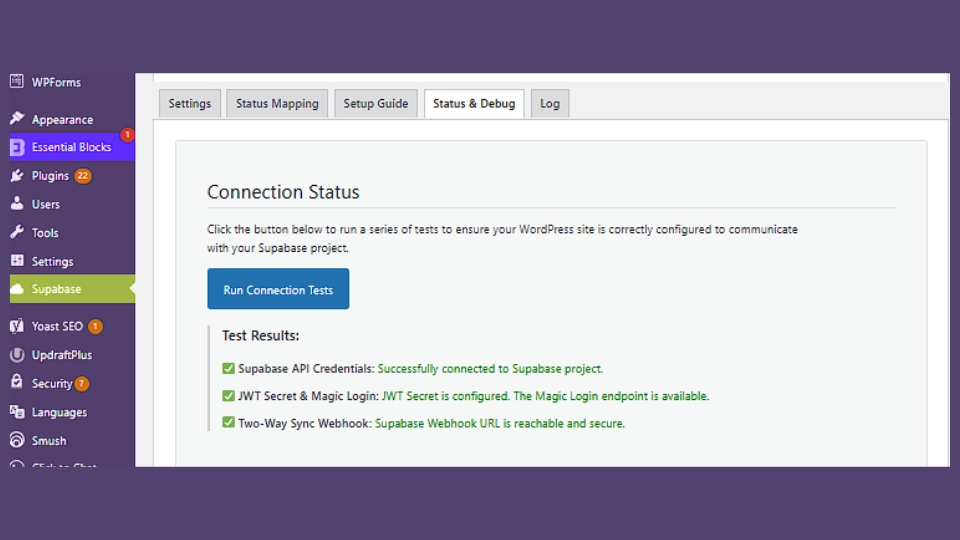
9. Test & Monitor Connections
Ensure your integration is robust and functioning correctly. The plugin provides tools to run connection tests, verifying the link between WordPress and Supabase. You can also monitor the last 100 events in real-time, helping you debug any issues quickly and efficiently.
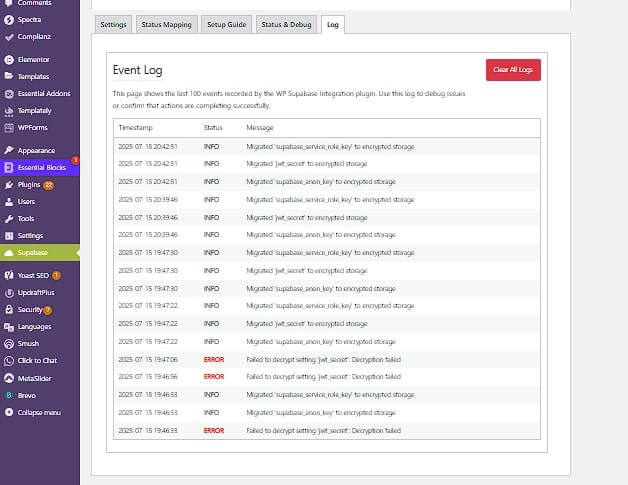
10. Monitor Events & Debug with the Built-In Event Log
Stay informed about your integration’s activity with a powerful built-in Event Log. This log records the last 100 actions performed by the WP Supa Integration plugin, offering invaluable insights for troubleshooting, security audits, and ensuring smooth operation.
Conclusion
The WP Supa Integration plugin transforms WordPress from a simple CMS into a powerful, full-stack application platform. By following these steps, you can seamlessly integrate Supabase’s authentication, real-time database, and serverless functions directly into your WordPress ecosystem. This unlocks endless possibilities for creating scalable, secure, and highly interactive web applications.
Embrace the future of WordPress development with a modern backend that empowers you to build more, with less code.